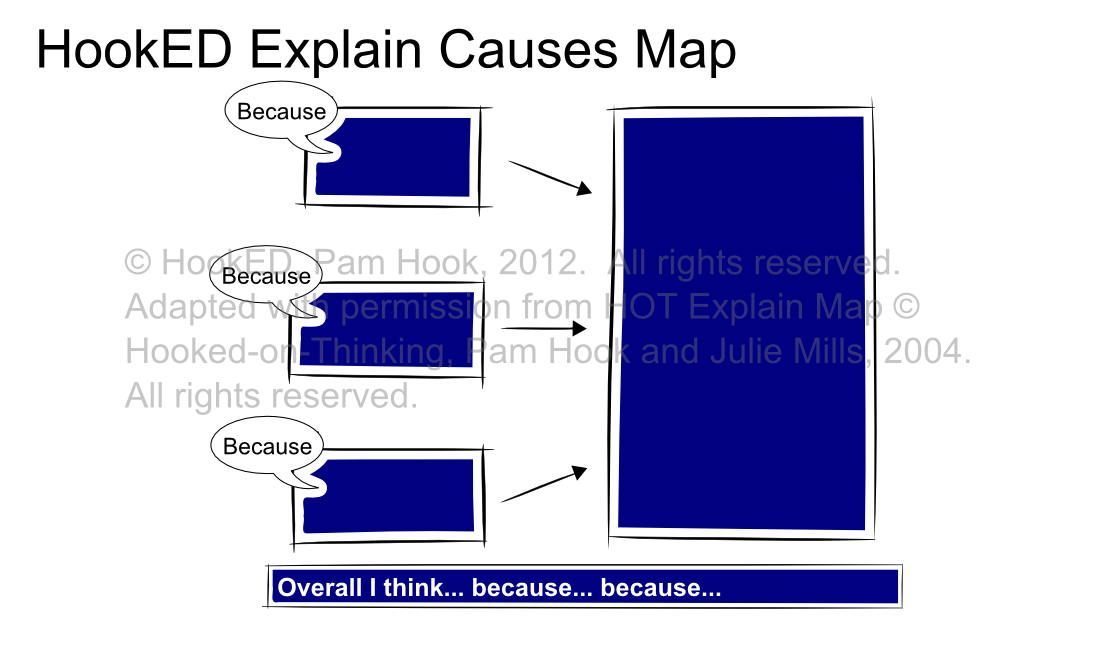
HookED SOLO Explain Causes Map
From HookED Wiki
HookED SOLO Explain Causes Map
HookED SOLO Explain Causes Self Assessment Rubric
File:SOLO EXPLAIN CAUSES Map HookED.pdf
How to use: SOLO Explain Causes Map
- Align the HookED SOLO Explain causes map and self assessment rubric with the identified learning intention. For example, “We are learning to explain the cause of [content] [context].”
- Place the event in the Event box on the right hand side of the map. It may be represented by text, a drawing, a photograph, a video, a graph or an extract from a newspaper.
- List possible causes for the event in the boxes on the left.
- Place a speech bubble next to each cause and explain why it is a cause. For example, “This is a cause because …”
- Make a generalisation about the causes of the event. For example, “Overall I think … because … because …”
- Share with the students the success criteria for explaining causes in the HookED SOLO Explain causes rubric.
- With reference to the success criteria, students create causal explanation statement using relevant causes and the target vocabulary in the HookED SOLO Explain causes map. They may write or say these statements or convey them through an annotated drawing. This process is iterative, meaning that students can repeat it whenever new learning occurs and thus can improve on the original explain causes statements.
- Students self or peer assess their causal explanations and seek teacher feedback on them.
- Students assess their learning outcome for the identified learning intention against the SOLO levels, explain why they have chosen this level of learning outcome for their work (feedback) and suggest “where to next” steps (feed up).
- Students record their work in a student learning log.
Student Use Examples
